Continuing with my 3D model of the Dark Acolyte, tonight I’ve been human head modelling in Blender.
Human Head Modelling In Blender


The explorations of an artloader.
Digital Art
Continuing with my 3D model of the Dark Acolyte, tonight I’ve been human head modelling in Blender.
OK, I made up the word “artloader” and now I’ve come up with a definition:
artloader
[ahrt-loh-der]
noun
Someone who loads art into stuff.

I am now working on a concept picture of a Dark Acolyte Of Mymosule from my digital comic project.
Continue reading “Box Modelling A Human Figure In Blender Experiment 1”

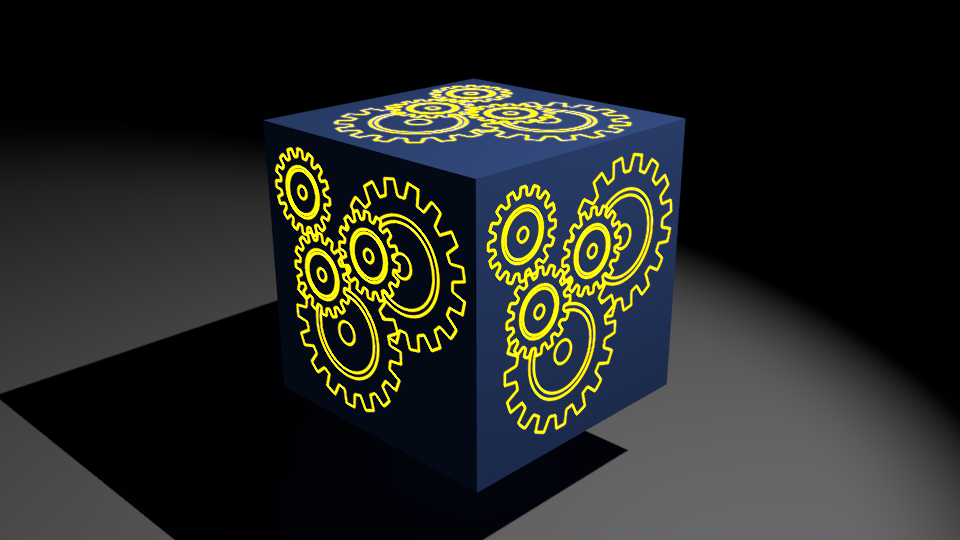
I have documented my process for applying a light emitting texture to an object in Blender.
Continue reading “Steampunk Logo in Blender With Light Emitting Texture”
Some of my mates suggested I tarnish my logo a little since that would be more steampunky so I wondered about using Vertex Painting in Blender.
This Blender Manual page on Vertex Painting gave me a good overview but I also found out that for vertex painting to be most effective, I had to have a lot of vertices.
It was no good having a really simple mesh like the one I started out with so I had to subdivide my mesh a fair bit.
Vertex Painting is awesome though! It allows you to paint directly onto your 3D mesh – a very natural way to add colour to your 3D models.

Now my logo has a nice bit of tarnishing:
OK so here’s the artloader.net logo.
I’m gonna leave it at this because I’m in danger of spending a silly amount of time messing about with the settings in Blender.
Below is the clockwork bump map image I made for this in Gimp:

And here are the bronze material settings in Blender:

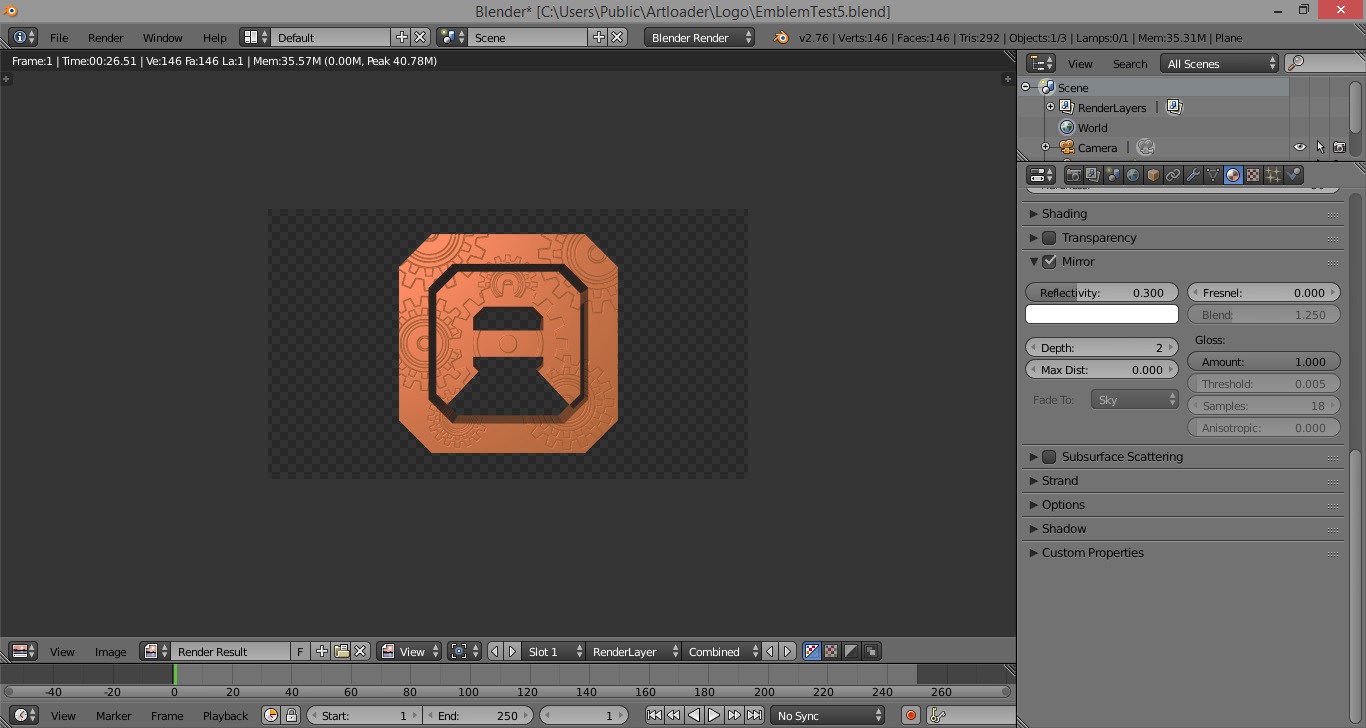

Here’s my 2nd logo design.
I’m trying for a steampunk feel by going for a brass-like colour with clock-work type cog wheels.
The 3D model was done in Blender and the cog wheel design was done in Gimp.

I needed a cog wheel image to apply as a bump map to my logo design so I had a little tinker in Gimp.
Here’s my process for making a cog wheel in Gimp.